Search This Blog

Sunday, 29 January 2012

Multigrain Bread

Baking bread always scared me. Yeast is a tricky thing. I have enough trouble with pizza dough. And bread is a lot more time to invest in a dough that is unyielding and dense.  I told myself all these horrrible things. That making bread is something that you have to take 40 years to practice - and only until your threadbare apron is sitting happily on your plump midline as your hair is up in curlers - THEN you can truly make good bread.  And let's face it - I don't want to have a perm when I'm 75 and neither do I want elasta-waist band pants.


So I fought off my demons of bread making - and found myself looking at a dough hook attachment for my mixer. I could at least blame any dough inconsistencies on my machine.


Up went the hair (in a simple elastic - no curlers) and up went the sleeves of my shirt. Despite some moments of doubt...and drawing upon any genetic bread making ability of my grandmothers, I was determined for success! I followed the recipe exactly - and I made two beautiful loaves of multigrain bread.  It was especially delicious with bakeapple jam and french press coffee.


I hope that you can put aside any fears you have today of baking bread - I think it takes practice - so get started :)


Multigrain Bread


Taken from America's Test Kitchen 2001-2011.
Yields - two loaves.

Ingredients:

1 1/4 cups seven-grain hot cereal mix (Bob's Red Mill or Arrowhead Mills are excellent choices)
2 1/2 cups boiling water (measure out AFTER you've boiled the water)
3 cups unbleached all-purpose flour, extra for work surface
1 1/2 cups whole wheat flour
1/4 cup honey
4 TBSP unsalted butter, melted and cooled slightly
2 1/4 tsp of instant yeast
1 TBSP salt
3/4 cup unsalted pumpkin seeds (can substitute for sunflower)
1/2 cup old fashioned rolled oats

Directions:

1. Place the cereal mix in the bowl of a standing mixer and pour the boiling water over it, stir, and let stand and cool for about 1 hour. It should look like thick porridge.  Whisk the flours together in a separate medium bowl.

2. Once the grain mixture has cooled, add honey, melted butter, and yeast and stir to combine. Attach the bowl to a standing mixer fitted with the dough hook. You should only ever have the mixer on low speed - no higher than 2! Add flours 1/2 cup at a time and let the machine knead until the dough forms a ball (about 2 minutes). Cover the bowl with plastic wrap and let dough rest 20 minutes.

3.  Add salt and knead again on low speed until the dough clears the sides of the bowl (2-3 minutes). Add pumpkin seeds and knead for another 15 seconds. Transfer dough to a floured work surface and knead by hand until the seeds are dispersed evenly in the dough and it forms a smooth taut ball. Place dough in a large greased bowl and cover with plastic wrap and allow to rise until doubled in size - 45-60 minutes.

4.  Adjust the oven rack to the middle position and preheat oven to 375 degrees. Grease (with butter, oil or spray) two bread pans and set aside. Transfer dough to a floured work surface and pat into a 12 by 9 inch rectangle; cut the dough in half crosswise with a knife.  with a short side facing you, starting at the fartest end, roll one dough piece into a log, keeping the roll taut by tucking it under itself as you go. Seal the loaf by pinching the seam together gently with your thumb and forefinger; repeat with the other loaf. Sprinkle water over each loaf - and roll each dough log in oat to coat evenly. Place seam side down in the greased loaf pans pressing gently into the corners; voer lightly with plastic wrap and let rise until almost doubled in size - 30-40 minutes. (The dough should barely spring back when poked with a knuckle).

5. Bake until the center of the loaves registers 200 degrees on an instant-read thermometer 35-40 minutes. Remove loaves from the pans and cool on a wire rack before slicing - 2 hours at least.

Because there aren't much preservatives in this bread - it should last a week so I usually keep one out and freeze the other in a freezer ziplock bag.

Enjoy with some homemade jellies or jams!

Tuesday, 3 January 2012

Cheese & Spice Potatoes

These are a classic side that goes pretty much with anything. In the meal I prepared in the photos, I cooked some maple glazed salmon with snow peas. It takes minutes to prepare and limited baking time - I find that russet baby potatoes work best.

Cheese & Spice Potatoes
Taken from my Dad's kitchen.

Ingredients:

Russet baby potatoes (I usually fill the cookie sheet for a serving of 3-4 people for a side dish)
1 1/2 cup old white cheddar cheese (2-5 year old)
3-4 TBSP olive oil
2-3 TBSP Montreal steak spice

Directions:

1. Preheat your oven to 375 and line the cookie sheet with foil.

2. Slice the potatoes in thin pieces and place in a medium sized bowl. Pour 3-4 TBSP of olive oil in the bowl and mix with hands until completely coated.

3. Arrange potato slices on cookie sheet so that there are none overlapping and they are evenly distributed.

4. Generously sprinkle Montreal steak spice over the top. Eyeballing it, it's approximately 2-3TBSP.

5. Place in oven and bake for 25 minutes.

6. While potatoes are baking, grate cheese and set aside.

7. Remove potatoes from oven and cover with cheese. Return to oven and bake for 5 more minutes.

It's that simple! Some favorite dishes that I've also had these potatoes with include BBQ steak or chicken, fish, lamb, and roast beef. Enjoy!

Saturday, 31 December 2011

Cranberry Scones


This season has been very busy! Traveling and visiting family over the holidays is delightful and busy in itself, however, living in a theatre for the last couple of weeks for rehearsals for the musical Mamma Mia has left my kitchen a little abandoned.

But what a better way to bring in some holiday cheer and energy than baking a yummy batch of cranberry scones and sharing with my wonderful cast? It was just the right touch after a long day.  Next week, we're back at it again so I'll have to bring some more goodies to keep us going!

Cranberry Scones
Adapted from http://annies-eats.com/
Makes approximately 8 scones
Ingredients:

1½ TBSP grated lemon zest
2½ cups all-purpose flour
½ cup plus 3 TBSP sugar, divided
1 TBSP baking powder
½ tsp salt
6 TBSP cold unsalted butter, cut into small pieces
1¼ cups fresh cranberries, coarsely chopped (these can also be frozen)
1 large egg plus 1 large egg yolk
1 cup heavy cream
Additional sugar for sprinkling
Directions:

1. Preheat the oven to 400˚ F.  Line a baking sheet with parchment paper.
2. In a medium bowl combine the lemon zest, flour, ½ cup of sugar, baking powder and salt.  Add in the cold butter pieces and mix briefly until it represents a coarse meal and the butter pieces are in small pieces.
3. In a small bowl, toss together the chopped cranberries and remaining 3 TBSP of sugar.  Stir this into the flour-butter mixture.
4. In a liquid measuring cup whisk the egg, egg yolk and heavy cream.   Add the liquid ingredients to the bowl with the dry ingredients and stir gently with a spatula or wooden spoon just until all the dry ingredients are moistened.  Knead gently to be sure the dough is evenly mixed, being careful not to overwork the dough.


5. You can either cut the scones using the same triangular method as seen in my Blueberry Scone recipe post, or you can simply roll out the dough and use a biscuit cutter to create circular scones. Because the dough is rather wet it is easier to use the circular cutters. Once dough is shaped and placed cookie sheet, sprinkle lightly with additional sugar.
Need to freeze?
Place the baking sheet with the shaped scones into the freezer and chill until frozen.  Transfer to a freezer-safe plastic bag and store until ready to bake.
6. Bake  until light golden brown, about 15-20 minutes.  (If baking from the freezer, add approximately 5 minutes to the original baking time.)

Thursday, 29 December 2011

Curry Chicken Casserole

Curry Chicken Casserole was a favorite growing up. However, despite my slightly disproportionate ratio of chicken to broccoli consumption as a child - I've come to love eating the broccoli too :)  This recipe is simple and is great for the family or for a small setting with the benefits of great leftovers.  I made this after a long hiatus probably about 5 years! I kind of forgot about it until I was looking through the family recipe book and was reunited again!


Curry Chicken Casserole
From my family cookbook
Serves 6 people


Ingredients:
4 chicken breasts
2 cups of broccoli florets (frozen or fresh)
2 tins cream of chicken soup
1/2 cup mayonnaise
2 TBSP curry yellow powder (more if you like spicier - less if you don't like a strong curry taste)
2 cups of grated cheddar cheese


Directions:
Preheat oven to 350.


1. Boil chicken breasts in lightly salted water for about 20 minutes.  Remove and discard bone and skin and cut chicken into small cubed pieces.


2.  Parboil broccoli for 5 minutes and place on the bottom of a rectangular casserole dish.


3.  Place cubed chicken atop of the broccoli.


4.  Combine soup and mayonnaise and curry in a separate bowl.


5.  Pour mixture over the chicken, and top with grated cheese.


6. Bake for 30 minutes. Serves well with jasmine or basmati rice.


Keeps well for a few days in the fridge and is excellent for leftovers.  Enjoy!

Wednesday, 28 December 2011

Apple Jelly

Mini disasters help you learn. I've certainly learned a lot from making apple jelly. Having not had much previous experience in the preserving world, I thought I would venture into making jelly.  I used the last of my locally picked apples, bought the necessary straining bags,  liquid Certo, and was on my way... to those mini disasters.

My pot was not quite as big as it should have been. Which lead to sticky jam boiling over onto my oven. Thankfully, not much juice was lost - and only tatters of my sanity. I dream of owning a Le Creuset set someday.

All was going smoothly and the jelly turned out relatively clear and a beautiful light rose hue.  However, after 24 hours of letting my jam "sit and settle" it was still like water. I was extremely disheartened.  A couple days of moping and occasionally shaking a bottle to see if it had set passed.

After a few days it seemed to set a little more - although it was still a little runny for my liking.  Apple jelly is a little tricky.  In any case, my answer to apple butter and salsa were easier to make as seen in my previous postings! I share all this not to scare you away from trying jelly - but just to let you know it's "finicky" and a little more tedious. So I would not introduce yourself to bottling with jelly, but warm up with some simple jams first!

Apple Jelly
Taken from Certo - www.kraftcanada.com
Yield: 8 cups

Ingredients:

Juice:
3 quarts (or 12 cups) of tart, juicy apples
6 1/2 cups of water

Jelly:
5 cups of prepared juice
2 TBSP lemon juice
7 1/2 cups granulated sugar
1 pouch CERTO Liquid Pectin

Materials:
Jelly Bag (see picture)
Preserving materials - bottles, etc. (see previous post from Apple Butter Recipe for more specific instructions on bottling)


Directions:

1. Remove blossom and stem ends from 3 quarts of apples, cut in small pieces (do not peel or core). Add 6 1/2 cups of water. Bring to a boil and simmer, covered, 10 minutes.

2. Crush pulp and simmer, covered 5 minutes more.

3. Extract juice:
a) Place prepared fruit in a jelly bag.
b) Place jelly bag in a colander over a bowl and let the juices drip - do not squeeze the bag as it will make your jelly cloudy!
c) If after your juice has been fully drained from the jelly bag - if there is insufficient juice you may need to add up to 1/2 water.

4. Pour 5 cups of prepared juice in a large saucepan (please use a LARGE one - and avoid boil over insanity) and stir in sugar and lemon juice.  Bring to a boil over high heat.

5. Boil hard for 1 minute.

6. Remove from heat and stir in CERTO Liquid Pectin.

7. Stir and skim for 5 minutes. Skimming is simply taking off the the thick layer of jelly that will form at the surface. Simply discard. To see if your jam is done use a metal spoon and dip it into the jelly mixture.  Take the spoon out and out of the steam and turn it sideways so the liquid runs off the side.  If the jelly is done, the mixture should be syrupy and form two drops that flow together and form a sheet that hangs off the edge of the spoon.

8.  Pour into warm sterilized jars (see process in Apple Butter recipe) to 1/4 inch from rim. Cover with lids and screw rings on tightly.


 These made great Christmas presents this year!  I did save a few for myself.


Saturday, 17 December 2011

Chocolate Delight Crinkle Cookies

Cocoa. It sounds, tastes, smells, and looks delicious. I have found a new favorite cookie - with cocoa. Lots of cocoa. I broke out my KitchenAid mixer, the Christmas tunes, and my red and white polka dot/snow flake apron and went to town.

This cookie may also make you do completely irrational things. Like eat it directly out of the oven while drinking out of a milk carton. I don't know anything about that - but that's what I've heard.

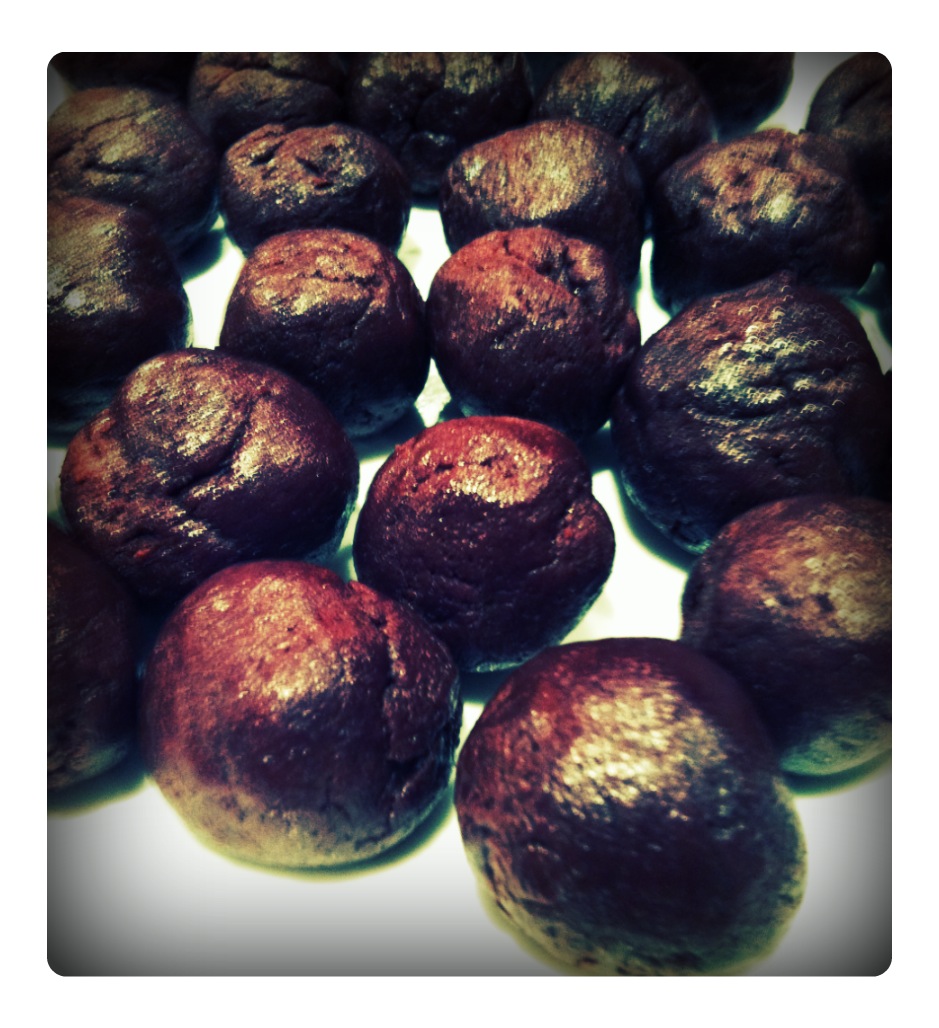
Please enjoy these - I am thinking that I may need to bake another batch since my cookie gift tins are taking it's toll on my personal cookie stash :)  It makes a yield of about 50. Think a dark deep chocolate taste balanced out with some icing sugar to make Christmas explode in your mouth.

Chocolate Delight Crinkle Cookies

Adapted  from simplyrecipes.com
Makes about 50 cookies.


Ingredients:

1 cup unsweetened cocoa powder
1 1/2 cups white sugar
1/2 cup canola oil
4 eggs
2 tsps pure vanilla extract
2 cups all-purpose flour
2 tsps baking powder
1/2 tsp salt
1 cup confectioner's sugar

Directions:

In the bowl of an electric mixer fitted with the paddle attachment (you can use  a wooden spoon and a regular bowl) beat together cocoa powder, white sugar, and oil until it comes together into a shiny, gritty, dark batter.

Add the eggs, one at a time, mixing for 30 seconds each.  Add the vanilla and beat thoroughly.

In a separate bowl, whisk flour, baking powder, and salt. Mix into the chocolate mixture on low speed until just combined - don't over mix.  Cover the bowl with plastic wrap and chill dough for 4 hours or overnight.

Preaheat oven 350 and line baking sheet with parchment paper.  Place confectioner's sugar in a large plate with a lip.  Using a spoon, get clumps of the chilled dough and roll them into 1 inch (2.5 cm) sized balls using your hands. Roll the balls in the confectioner's sugar and place on the cookie sheet. You should be able to fit approximately 12-16.

Bake for 13-15 minutes. Allow to cool on a wire rack.


Tuesday, 13 December 2011

Marshmallow Roll Cookies

Marshmallow Roll Cookies
Taken from family friend Mrs. Strong.


Ingredients:

2 cups finely shredded sweetened coconut
2 cups graham wafer crumbs
1/2 cup butter
1 tsp vanilla
1 tin sweetened condensed milk
1 bag large white marshmallows


Directions:

Place coconut and graham crumbs in a large mixing bowl.  Add softened butter and rub together with your hands until well blended.
Add condensed milk and vanilla. Stir until well blended.

On a flat surface, lay a long sheet (about 2 feet) of waxed paper.  Place half of cookie mixture on the sheet an flatten to a rectangle approximately 6 x 24.

Place a row of marshmallows side by side along edge of mixture.  Using the wax paper as a guide, roll mixture tightly around marshmallows and seal seam by pressing together.  Twist ends of waxed paper (so it looks like a giant candy wrapper) and freeze.

Repeat with remaining cookie mixture.

Cut cookies from frozen roll and enjoy frozen or thawed.

In two weeks, I've made these twice - they are a popular item for my Christmas tins!

This may look more like a stick of chicken schawarma, but don't be alarmed -
you can remove the wax paper and cut the whole roll,
or simply cut off the ends.